About
Handshake helps you get OAuth tokens to your users' accounts in over 200 apps and services. It's an open-source Next.js app that you can easily configure and deploy.
How it works
Suppose you want to access your users' Salesforce data. You will need to your users for a Salesforce access token to communicate with the Salesforce API on their behalf. Handshake can help with you.
To acquire Salesforce credentials for a user, redirect them to:
https://YOUR_HANDSHAKE_URL/auth/salesforce/redirect
  ?state=123456&
  &callback_uri=https://app.example.com/integrations
Where YOUR_HANDSHAKE_URL is something like https://handshake.example.com or
wherever you want to host this app.
Handshake will then handle all the OAuth dance with Salesforce on your behalf.
We will redirect the user to a Salesforce page where they can authorize your app
to access their data. Salesforce will then redirect the user back to
YOUR_HANDSHAKE_URL, from where we will redirect the user back to you.
Setup
Clone the project to your machine:
git clone https://github.com/fiberinc/handshake.gitInstall dependencies:
cd handshake
pnpm i
Build the project:
pnpm buildSet environment variables
Duplicate the .env.example file within the app folder:
cp app/.env.example app/.envIn the new file, replace the values for ALLOWED_REDIRECT_HOST and SESSION_SECRET.
Configure your providers
Modify the app/options.ts file to include the providers you want to use:
import { HandshakeOptions, GitHub } from "handshake";

const options: HandshakeOptions = {
  // Register the providers you want to use, entering the
  // required credentials for each of them.
  handlers: [
    GitHub({
      clientId: process.env.GITHUB_CLIENT_ID!,
      clientSecret: process.env.GITHUB_CLIENT_SECRET!,
      scopes: ["repo"],
    }),
  ],
  // Tell Handshake which hosts it can redirect users back to. This is a
  // security measure to prevent malicious redirects.
  allowedRedirectHosts: [process.env.ALLOWED_REDIRECT_HOST],
  // Set a unique secret to sign session cookies.
  secret: process.env.SESSION_SECRET!,
};
Make sure to place sensitive information in your .env file.
You can now run your app:
cd app
pnpm dev
If you navigate to localhost:3000, you should see a list of all the configured
providers:

Deploy
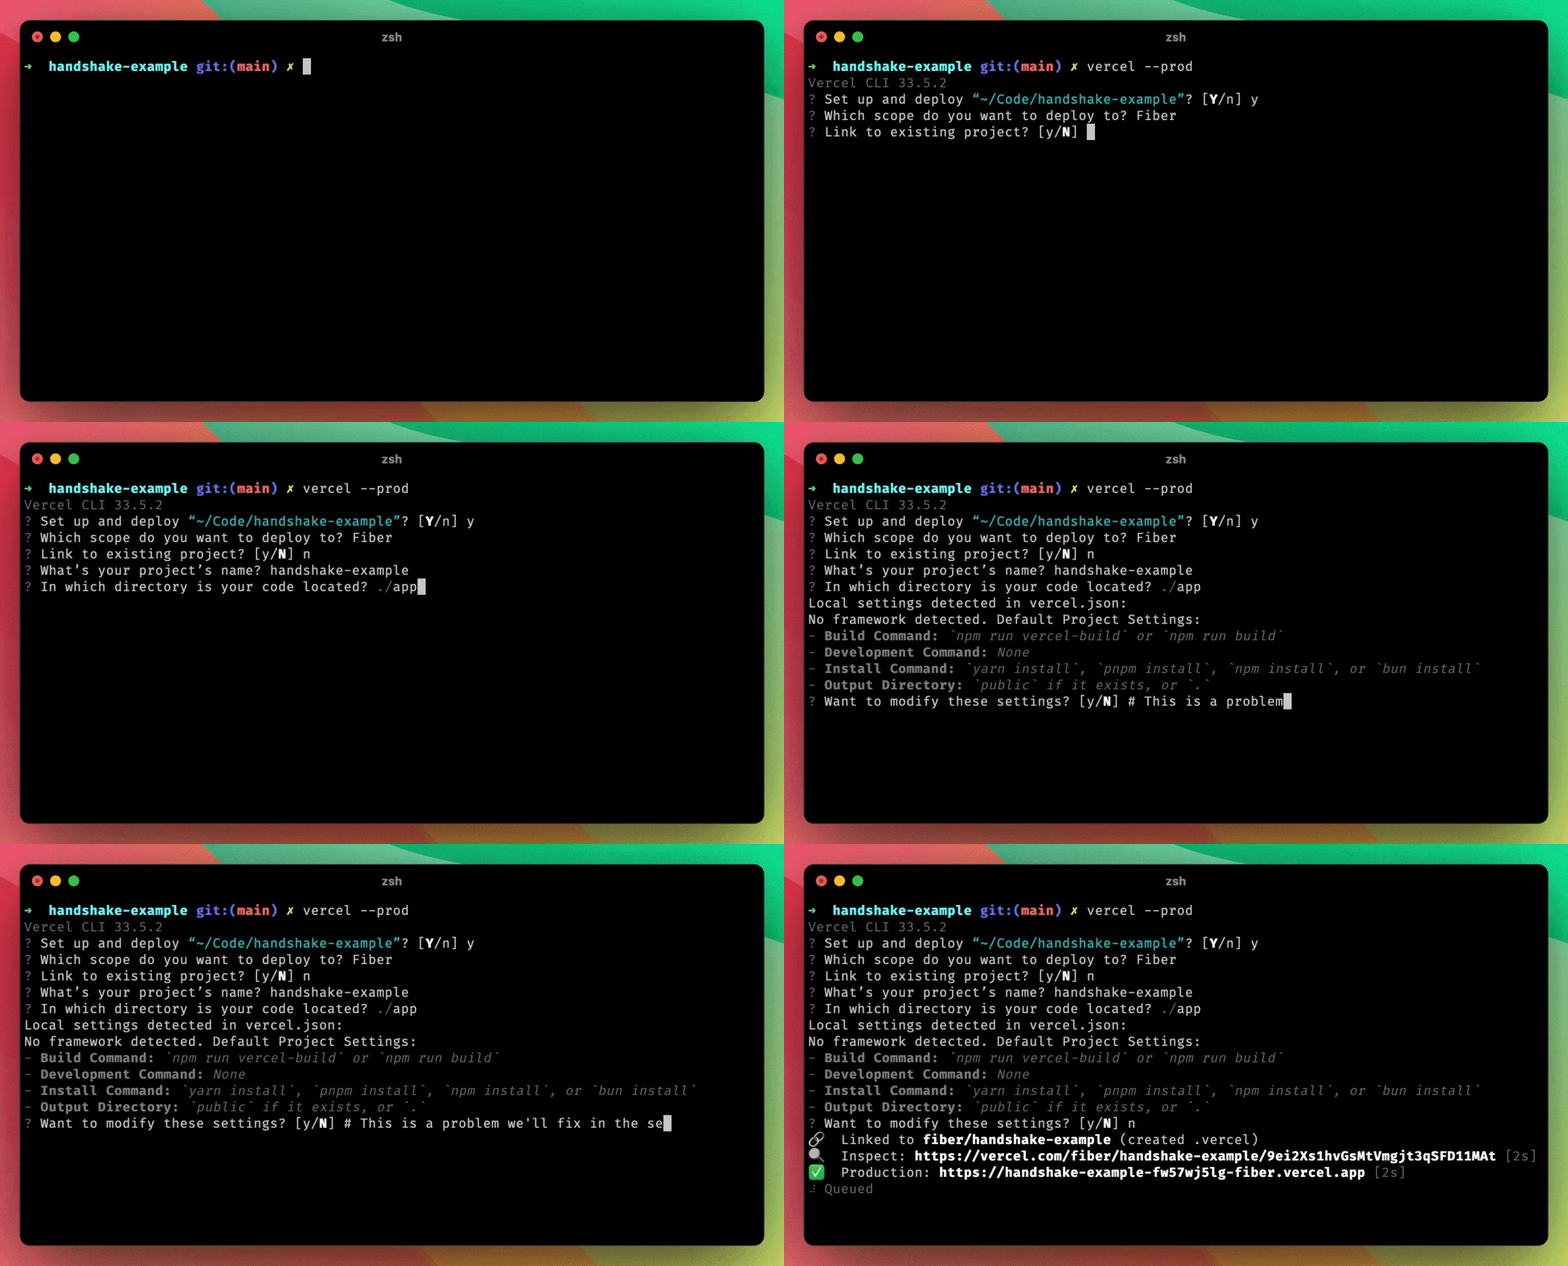
Deploy the app to Vercel by running, from the root folder:
vercel deployYou must call vercel deploy from the root folder, even though the Next.js
app folder lives within app/. The app code needs the handshake/ folder,
which otherwise won't be available.

The command may tell you "No framework detected" instead of detecting Next.js as your framework. Steps to fix this are outlined below.
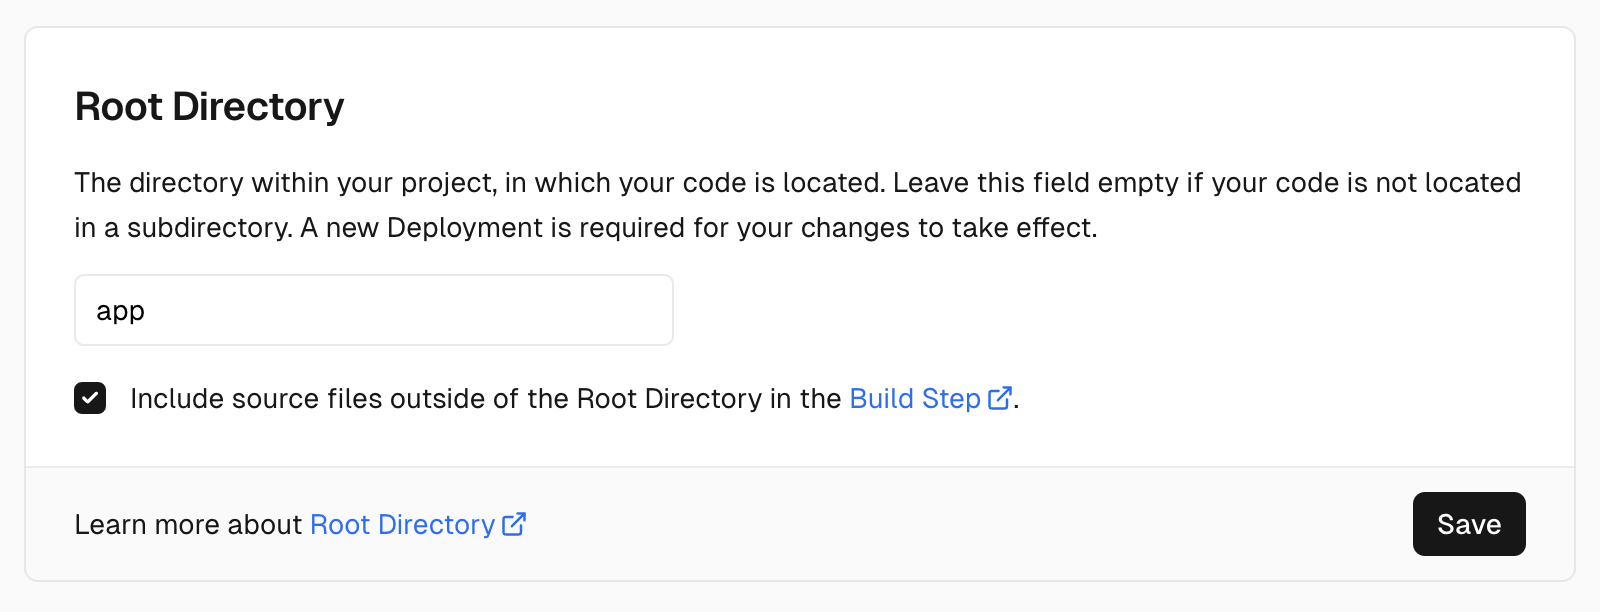
Fix project root and framework preset in Vercel
Once your project exists within Vercel, go to Settings > General.
First, set "Framework Preset" setting to "Next.js".

Then, set the "Root Directory" to app. This will tell Vercel to look for the
actual Next.js code in the right folder.

Upload environment variables to Vercel
Set SESSION_SECRET, ALLOWED_REDIRECT_HOST and any other secrets you're using by going
to Settings > Environment Variables, or directly via the Vercel
CLI.
FAQ
Can you add support for X provider?
Yes! Please open an issue or reach out to us at team@fiber.dev.
How is this different from next-auth or passport?
Libraries like next-auth and passport help you sign users into your app using their third-party identities. You use them to implement buttons that say "Sign In With Google" or "Sign In With GitHub".
In contrast, Handshake help you obtain access tokens to your users' accounts in
other apps. It's authorization instead of authentication. Handshake actually
uses next-auth's large catalog of OAuth provider information under the hood.
Contributing
Thank you for considering contributing to Handshake! If you believe you found a bug, open an issue. To add new features or make improvements to the code, create a pull request.
License
MIT